How to create a tile grid overlay for the Garmin Edge based on VeloViewer unexplored tiles
This is a short HOWTO on creating a map overlay for the Garmin Edge default map, containing an unexplored tile grid downloaded from VeloViewer.
All it takes is three simple steps:
- Download the grid of unexplored tiles from VeloViewer
- Convert the downloaded KML file to the OSM format using GPSBabel
- Generate a transparent map layer with a tile grid in a Garmin compatible format with mkgmap
Of course, at the end you need to transfer the generated map to your device.
Step 1 — Downloading the grid
To get the coordinates of your unexplored tiles, you have to go to your VeloViewer activities tab.
Zoom the map to the specific area that you are interested in. VeloViewer will only export those unexplored tiles which are fully visible in the current view.
Click the gear icon on the right and click the unexplored tiles export button. There is a number of tiles in the current map view displayed next to it.

By default the file is saved as the unexplored_tiles.kml in a KML format.
It is best to create a new folder and to save the file in there to keep everything in one place (there are several more files to come).
Removing the “tick” (optional)
To differentiate between two types of tiles, VeloViewer adds a small “tick” in the upper left corner of an unvisited tile:

You can erase it by removing the coordinates of the first point in every tile, using perl (or your other favourite regexp tool):
perl -pi -e "s/(<coordinates>)[^ ]+ /\1/g" unexplored_tiles.kmlAfter that the unexplored_tiles.kml file should have 5 points for every tile, instead of 6 and the resulting grid will have no ticks.

But you can also leave it as is if you like.
Step 2 — Converting to OSM format
The conversion is necessary because the mkgmap program, which generates maps for Garmin GPS units, requires a file in the OSM format as an input.
To convert between different GPS formats it is best to use GPSBabel. You can use the GUI wrapper if you want, but for me the standard command line version is much easier.
It is important to also tag all the lines with tag=highway:primary. It will be used later to set the style of the grid lines.
gpsbabel -i kml -f unexplored_tiles.kml -o osm,tag=highway:primary -F unexplored_tiles.osmThe result of the above command will be written to the unexplored_tiles.osm file which is the input file for the mkgmap.
Step 3 — Generating the map
If you don’t have the mkgmap tool, you have to get it first from this site and unzip it into your working folder (after unzipping there should be a subfolder named mkgmap-rXXXX, where XXXX is the current version).
At the time of writing the newest version was 4600.
If your version is different, or you have mkgmap.jar in another location, you will have to update the java command below to reflect it.
Config files
To generate a proper map layer with mkgmap you need to create three config files in your working folder, with the content given bellow (and name them accordingly).
You can also download them from my Dropbox share:
https://www.dropbox.com/sh/78uzch2q82r07bq/AAAzaAxp2Dz-8TQE7R26Jwoya?dl=0
For those using Linux/Unix or MacOS, there are also shell scripts available for every command used in this article.
typ.txt
The first file is a TYP file which contains style definitions for Garmin maps (actually TYP file is a binary format but it will be automatically created based on the typ.txt file).
You can modify it if you want to set a different line width (default is 1 pixel) or a different colour (default is #AA0000 — dark red).
It is possible to tweak it a little more (e.g. making dashed lines instead of solid ones, etc.), but that is out of scope of this HOWTO. If you are interested take a look at the typ2.txt file on my Dropbox for some more details.
[_line]
Type=0x01
UseOrientation=N
LineWidth=1
Xpm="0 0 1 0"
"1 c #AA0000"
String=solid line
FontStyle=NoLabel
[end]
mkgmap.style
This file applies the style defined in the TYP file to the grid lines, based on the tag set during the conversion, and also sets the visibility levels.
<<<version>>>
0
<<<options>>>
levels: 0:24, 1:22, 2:20, 3:18, 4:16
<<<lines>>>
$highway=primary [0x1 level 3]
config.txt
This file contains the list of options for the mkgmap program. They can also be declared as command line parameters, it is just easier this way. I won’t explain them here as they are well documented in the mkgmap docs.
family-id: 66
product-id: 1
latin1
description: unexplored tiles
draw-priority: 100
style-file: mkgmap.style
transparent
gmapsupp
output-dir=output
Generating the map
The mkgmap program is written in Java so you need the JRE to run it.
java -jar mkgmap-r4600/mkgmap.jar -c config.txt typ.txt unexplored_tiles.osmAnd that’s about it. You should now have a new subfolder named output, with several files in it. One of them is gmapsupp.img which is the Garmin map with the grid layer. Upload it to your Garmin Edge, directly into the Garmin folder (you can change the name of the file to whatever you like, e.g. unexplored.img; just don’t overwrite existing files unless it is a previous version of your map).
Next time you run your Garmin Edge the map should already be present on the list of the installed maps:
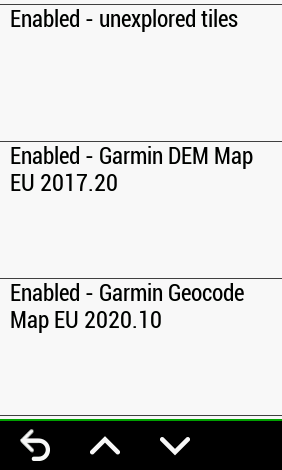
and the grid should be visible on the map as well:

Happy exploring! 😉
